|
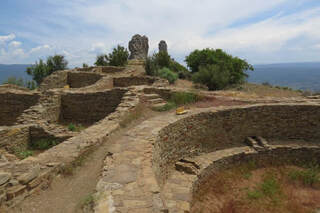
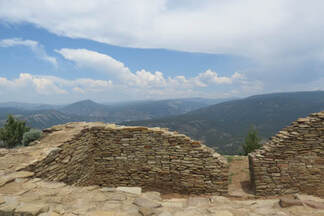
I made a pair of jigsaw puzzles, for those looking for a challenge and maybe for those suffering from some archaeological wanderlust. They're both photos I took at the Chimney Rock great house, a Chacoan site in southwest Colorado. Click on the photos below to get to the puzzles. You can adjust the puzzles to make them more challenging by adding more pieces! Chimney Rock is the name of the double-spired natural feature in the photo below, and the great house was built in the 11th century AD on a high mesa top overlooking it. The beautiful stone masonry architecture marks it as a clear part of the Chaco Canyon regional system, even though it is over 90 miles north of Chaco. The high mesa top has no groundwater, and the high elevation makes it pretty inhospitable. Nonetheless, archaeologists think it was an important ceremonial site. The Ancestral Puebloan people who built it were astronomers, keeping close track of the sun and the moon, and they discovered an astronomical phenomenon we now know as the lunar maximum. This is the end of the moon's complicated 18.6 year cycle. If you were standing at the great house on the night of the lunar maximum, you would see the moon rise between the two spires. Tree ring dating has shown that people cut the wood to build the great house just before the lunar maximum of 1076, and they renovated it right before the lunar maximum of 1093. To learn more about Chimney Rock:
http://www.chimneyrockco.org Lekson, Stephen H. 2015. The Chaco Meridian: One Thousand Years of Political and Religious Power in the Ancient Southwest. 2nd ed. Lanham, MD: Rowman & Littlefield. Lister, Florence C. 2011. In the Shadow of the Rocks: Archaeology of the Chimney Rock District in Southwest Colorado.2nd ed. Durango, CO: Durango Herald Small Press. Malville, J. McKim. 2008. A Guide to Prehistoric Astronomy in the Southwest. Boulder: Johnson Books. Todd, Brenda K. “Chimney Rock, an Eleventh Century Chacoan Great House: Export, Emulation, Or Something Else?” Ph.D. diss., University of Colorado, 2012.
3 Comments
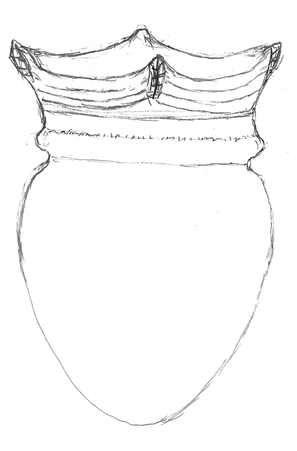
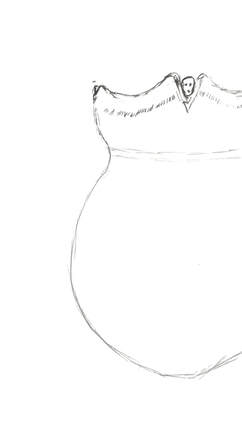
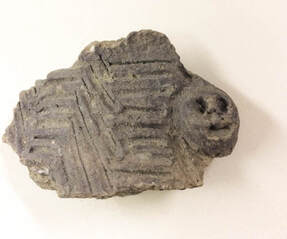
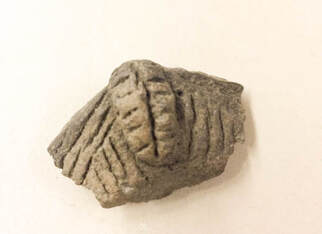
How can archaeology help us think about the terrifying pandemic we are living through? I’ve seen archaeologists ominously talking of epidemics in the past that brought about societal collapse or revolution. But as we are seeing in our own time, the large-scale stories—like the global statistics in the news every morning—don’t actually tell us much about what an epidemic is like for the people living through it. It is the small stories that take our breath away, the woman caring for her critically ill husband, the nurse asking for donations of masks. Archaeology can rarely get at those kinds of personal stories, but I would like to tell an archaeological story at a smaller scale, about community resilience and beautiful pottery made by Native American women in New England. Archaeologists working in New England—like everyone else who lives there—are standing on the ruins of devastating epidemics. In 1620, when the pilgrims left the Mayflower, what they found first were cleared fields, empty villages, and recently-dug graves. Disease brought by earlier European visitors had already reached Wampanoag communities. Throughout North America, hundreds of thousands, perhaps millions, of Indigenous people perished from European diseases. Like all of us today, Indigenous people in the post-contact period found themselves exposed to microbes which their immune systems had never encountered before. Their bodies were largely defenseless against diseases like smallpox. Disease is just one part of a larger story of Native American dispossession and genocide, but epidemic disease set the stage for the conflict, land grabs and colonialist expansion that followed. Shantok pottery is a ceramic ware found at sites in Connecticut from the early post-contact period, when many of these epidemics were raging. Shantok pottery is remarkable for its extraordinary degree of decoration. OK, it’s not painted or glazed, it’s just brown and plain, and it might not even catch your eye if you saw it in a museum. But in New England, where Indigenous pottery is mostly fairly utilitarian, Shantok pottery stands out. The bodies of these jars, like other Native pottery in this region, are plain with rounded or slightly pointed bases, meant to rest in the ashes of a cooking fire. But Shantok pots, unlike earlier designs, have elaborately worked and decorated collars and rims, with geometric incised decorations carved in the clay with a sharp tool. And many Shantok pots are also “castellated,” with dramatic rim points (like the battlements of a castle). These pots represent a technological and artistic feat. Their walls are extremely thin, despite supporting elaborate collars that had to survive both their firing and their use life. They are tempered with shell, very different from the rough stone temper used in much of Connecticut’s Native-produced pottery. And unlike most other pots of this time period, which were intentionally roughened for grip, these pots are generally highly smoothed. We don’t know a lot about how these pots were used, but their ubiquity (at some sites at least) has led archaeologists to assume that they were cooking ware. Fancy cooking pots indeed. Some Shantok pots even have effigy or even figurative decorations, something hardly ever seen in earlier periods. Some have decorations on the rim points that have been described as corncob effigies. Also common are V-shaped points that scholars have interpreted as representing a vagina. The vagina imagery and the corn imagery seem to run together, in fact—female fertility and agricultural fertility melding together. Some Shantok pots actually have a little face perched inside the V—a representation of a baby being born. At least one pot has a face on both the interior and the exterior, perhaps representing a woman carrying a baby on her back. The female themes seem to confirm that the pots were probably made by women (as we believe most New England pottery was). Some archaeologists have viewed these unusual pots as fertility symbols.
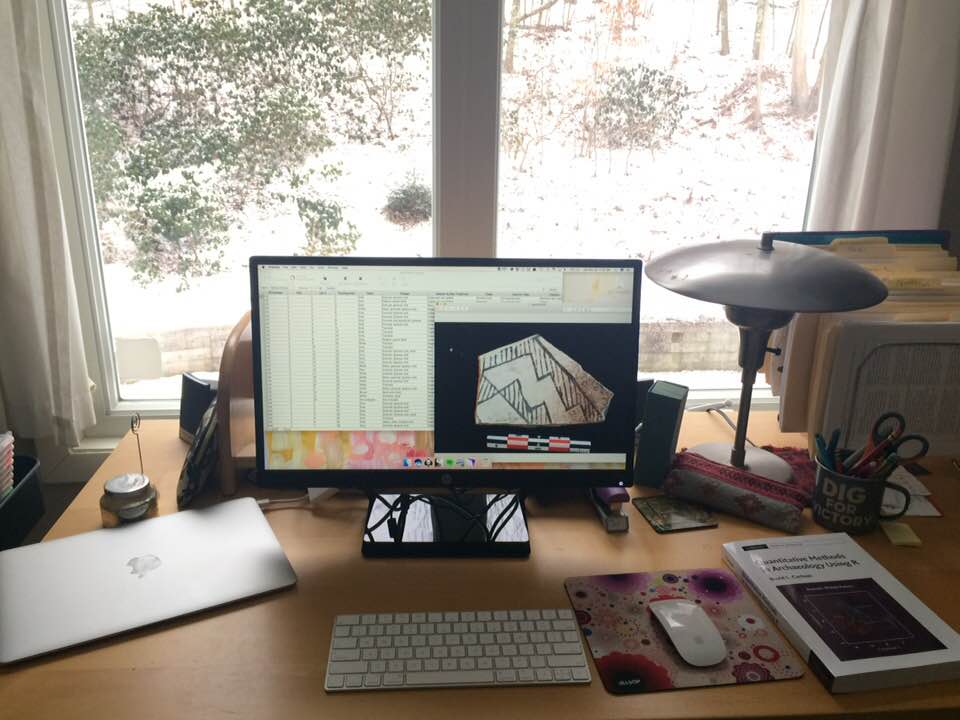
Shantok pottery appeared relatively suddenly and was made for only a short time period. Appearing by the mid-1600s and disappearing by the early 1700s, it represents a snapshot of the post-contact period. This period brought devastating disease, genocidal warfare, dispossession of traditional homelands and rapid social and economic transformations. By 1634, the English and Dutch began opening trade on the Connecticut River, and British colonists established posts at Wethersfield in 1634 and Fort Saybrook in 1635, and then at Windsor and Hartford in 1636. Native American communities experienced massive changes as a result of these new arrivals. In 1637, British settlers and their Native allies carried out the Pequot War, attacking and burning a Pequot community in Mystic and massacring men, women and children as they fled. Hundreds were killed in the Mystic Massacre and subsequent actions, and survivors were executed or sold into slavery or became refugees with neighboring tribes. Shantok pottery appears throughout Connecticut and even on Long Island, and pottery very much like it may have been made in many different communities. However, Shantok itself is most closely associated with Fort Shantok, where it made up a large proportion of the pottery. This 17th century village in southeastern Connecticut, near what is now Montville, was a central community of the Mohegan people and the home base of their sachem (leader) Uncas. Located on a promontory into the Thames River, surrounded on three sides by water and with a wooden palisade on the fourth side, it was a highly defensible location. In a rapidly changing political situation, Uncas sought to ally himself with the British, and Mohegans helped the British in the Pequot War. Fort Shantok grew much larger after the war, absorbing much of the remaining Pequot population as well as other refugees. In 1637, missionary Roger Williams wrote of 300 men in Uncas’s town, of whom fewer than 50 were Mohegans. While Pequots and other refugees swelled the size of the town, there was a lack of cohesion. Many Pequots left again as soon as they could. Historical records indicate that the Mohegans had strong trade ties with British colonists, and archaeological excavations at Fort Shantok bore this out, revealing many objects of European manufacture such as metal cooking pots in addition to Native-made artifacts. Shantok pottery seems to have appeared at or soon after the peak of Native American deaths from disease. A devastating smallpox epidemic struck in 1634, with massive mortality rates. Narragansett, Pocumtuck and Pequot communities are believed to have lost over 80% of their population in this epidemic, and the Mohegans likely suffered similar losses. John Winthrop, governor of the Massachusetts Bay Colony, wrote in 1634 that the Indians “are neere all dead of the small Poxe, so as the Lorde hathe cleared our title to what we possess.” (He meant their land, of course.) Additional epidemics continued through the 1640s and 1650s. By 1650, Native populations in southeastern Connecticut may have declined by 77% or more. The effects of these epidemics went beyond sheer numbers, beyond personal experiences of loss. Communities likely also lost political leaders, religious figures, elders with medicinal or agricultural knowledge, skilled craftspeople and storytellers. Among other things, traditional religious practice, perhaps seen as failing in this time of disaster, may have come into question, and new practices may have emerged. These human losses were, as Winthrop’s comment indicates, accompanied by parallel and related processes of land dispossession and economic upheaval. The development of the European fur trade led to a major reallocation of Native American labor. As traditional Native wampum (shell beads) became a currency sought by Europeans for the fur trade, many Native people were pulled into much larger scale wampum production, shifting away from traditional subsistence practices and towards trade with colonists. Europeans increasingly trespassed on Native land. In 1654, while Uncas and his people were away hunting, New London colonists occupied and tried to claim Fort Shantok. Such incursions continued, as did land sales. Both the loss of land and the changes in the economy resulted in increased sedentism, decreased maize cultivation and other major cultural changes. All of this also had a major impact on gender relations. The wampum economy and the loss of land particularly diminished the status of women, who were once the farmers in Native society, in favor of men, who were more able to participate in the colonial, patriarchal economy. So what does all this have to do with Shantok pottery? Some archaeologists have interpreted its dramatic designs, which appear so suddenly in this period, as a very intentional effort to build a new, pan-Indian identity as Mohegan and Pequot refugees came together at Fort Shantok and other places. But other archaeologists see the feminine imagery as a response by women potters to their increasing subordination and the devastation of disease. Although they seem to have had access to metal European pots, they did not abandon their traditional cooking pottery but instead made it more elaborate and increasingly incorporated female symbolism. We cannot know exactly what this pottery or its designs mean. Its fairly abrupt appearance and its distinctive design suggests that potters were consciously developing a new vernacular in response to the changes going on around them. Archaeologists often talk about the conservatism of pottery—potters generally continue working very much as their mothers taught them and changes are only gradual and small, so a major change like this is notable. It’s also important that despite all the upheaval, women still made the choice to invest their labor in the elaborate decoration of this pottery. The designs suggest a focus on restoring human and agricultural life cycles. Exactly what it meant to its makers is elusive, but archaeologists increasingly think about pottery and other objects as more than mere possessions. Native ontologies or life-views, we now understand, include the possibility that objects are, in some way, alive. Pottery-making traditions in Indigenous communities and around the world include the belief that pots contain spirits. This seems a reasonable interpretation of elaborately decorated pots that include actual faces. The concept that a pot may be a “person” is foreign to many Westerners, but less foreign is the idea that the objects we live with and treasure constantly shape our lives, or that the things you create will reflect what you are living through. More than just a fertility symbol, this pottery may have played an active role in social change in this time period, as this society struggled to regain its footing after devastating disease. Perhaps the elaborated rim points of Shantok pottery played a role in ritual or magic related to fertility. Or perhaps cooking pottery, in a time of death and hunger, simply took on new importance as part of the more quotidian magic of making food and keeping babies alive. Today, Fort Shantok is Mohegan land again, after the tribe repurchased it from the State of Connecticut in the 1990s at a cost of $3 million. It is a burial ground and sacred land. Just recently, the Yale Peabody Museum repatriated all of its artifacts excavated from Fort Shantok to the Mohegan people. The Mashantucket Pequot people, also alive and well, have built an extraordinary museum that tells their history from their perspective. The story of Native people in New England is one of disease and dispossession, but they are still here and writing new stories of resiliency and continuity. The disease we face today is terrifying, but history reminds us that disease has devastated human communities before. Epidemics inevitably bring horror, loss and social change, but people persevere and find ways to cope with an altered reality. Think how much our world and our viewpoints have changed in just the past few weeks. While we don’t know what the future brings, it is already clear that we will no longer be the same society after this pandemic. We will surely be left with new understandings of what we do and do not want our society to look like. Political and economic change may come, but we may also see new forms of creativity, innovation and, yes, beauty. Selected Sources and Further Reading: Bruchac, Marge 2014 “Of Shells and Ship’s Nails.” https://wampumtrail.wordpress.com/tag/fort-shantok/ (last accessed 3/27/20). Carlson, C.C., G.J. Armelagos, and A.L. Magennis 1992 Impact of Disease on the Precontact and Early Historic Populations of New England and the Maritimes. In Disease and Demography in the Americas, edited by J.W. Verano and D.H. Ubelaker, pp.141-153. Smithsonian Institution Press, Washington, D.C. Goodby, Robert G. 2002 Reconsidering the Shantok Tradition. In A Lasting Impression: Coastal, Lithic, and Ceramic Research in New England Archaeology, edited by Jordan E. Kerber, pp. 141-154. Praeger, Westport, CT. Johnson, Eric S. 2000 The Politics of Pottery: Material Culture and Political Process among Algonquians of 17th-Century Southern New England. In Interpretations of Native North American Life : Material Contributions to Ethnohistory, edited by Michael S. Nassaney and Eric S. Johnson, pp. 118-145. University Press of Florida, Gainesville. Lavin, Lucianne 2013 Connecticut's Indigenous Peoples: What Archaeology, History, and Oral Traditions Teach Us About Their Communities and Cultures.Yale University Press, New Haven. Nassaney, Michael S. 2004 Native American Gender Politics and Material Culture in Seventeenth-Century Southeastern New England. Journal of Social Archaeology 4(3):334-367. Oberg, Michael Leroy 2003 Uncas: First of the Mohegans. Cornell University Press, Ithaca. I recently spent two years writing a dissertation from my rural home, with hardly any human contact, so I have some experience with what we’re now calling self-isolation and social distancing. Before that, I spent a decade as a practicing attorney, which despite what TV shows you, mostly meant sitting alone in an office and writing motions and briefs that were due on strict court deadlines, while billing my time in 6 minute increments. So I know a thing or two about being productive when your work means sitting in a chair with little social contact. With everyone working from home lately and struggling with being productive, I thought that some of my experiences might be helpful to someone. I think the first step is to accept that you’re not going to be productive right now. You’re just not. The same way my productivity crashed in November 2016 when a devastating election and horrifying news took over my life. The same way I had a hard time getting my motions written while my brother was fleeing from Hurricane Katrina. Our brains are focused on human survival right now, not on getting another document written. But eventually, awful as it sounds, those of us who stay healthy will start getting used to our new normal, and in this strange new world, work can be a respite. Establish a routine, get dressed every morning, get your butt in the chair. But then what? To be productive, you have to work on reducing your attention to the outside world. You’ve gotten the gist by now of what is going on in the world, and unless you’re a first responder, there’s nothing much you can do about it beyond staying home. But you’ll also be lonely, and things like social media and news and streaming TV are a lifeline right now and a connection to the old lives we’re all grieving for. Of course those connections attract us, and are a needed escape from what’s going on. But loneliness is part of hard work, at least if you are writing or creating art or doing anything else that requires deep attention. You can engage in some escapism, you should engage in some escapism! The trick is not to spend your whole day on the internet. You can’t be turning to the internet for a hit every time you feel lonely or sad—or every time the work gets hard. To some extent you just have to embrace the solitude. You can try to put your phone in the other room, close your email, tidy up your office, create time and space for attention. But personally, I never would have finished my dissertation without technology that actually turned the internet off and forced me to get back to work. I mainly used the Freedom app, and I’ve kept using it even after finishing my dissertation. I do recommend a paid subscription, which allows you to schedule your day and automatically turn off your distractions. I allow myself a few hours of free internet access 3x a day, but Freedom blocks my access from 9-12, 1-5 and then from 7 pm to 6 am. You can adjust the times and also choose which sites are or are not accessible. I only block social media, news sites, and a few other sources on Freedom, because those are the sites that send me down rabbit holes of distraction. Or you can block everything—which wasn’t usually an option for me since I needed to do library research online. Some days though, I’d find myself so distracted that I needed to shut my internet access off completely. For those times, I used a different app called Self Control to shut my access down completely. (Freedom can do this too of course, SelfControl is just a little easier for me to get at.) Often, just an hour of no WiFi will help me get back on track. Right now, my biggest distraction is coming from text messages, which was not previously the case, so I’m working on how to reduce that distraction. It may involve deleting Messages from my Mac and hiding my phone for part of the day. The Freedom app is also available on your phone, so that is another possibility. Meditation is super helpful in bringing your wandering mind back, but it does take practice and a daily commitment. But even if it’s just ten minutes when your mind is frazzled, it will help. Just don’t let meditation become another thing you beat yourself up over. I really liked the Calm app before it went to all pay, and it might be worth the cost right now. I have a great app on my phone called Breathe with some good, free guided meditations. There are also about a million guided meditations on YouTube. Music is great, of course. For me, it has to be quiet music that is so familiar that my brain doesn’t engage with it too much. There is one album I played so much that it now just automatically puts me into work mode when I start it (Mandolin Orange’s Tides of a Teardrop). Developing “get to work” rituals like this that help you get your head in the zone can be super helpful. Spotify has great study playlists and coffee house playlists, see what works for you. Or maybe you just need some white noise? Try this. Making tea and lighting a candle are also often part of my ritual. Exercise can also focus the mind, and your body desperately needs it when you’re working from home. I literally ended up in physical therapy from spending too much time sitting at my desk while writing. Do something, anything. I walk my dog, and getting out into the woods does wonders for my mood as well as my poor knees. I also do my PT stretches and some yoga stretches. And I love Yoga with Adriene on YouTube, especially when I'm in pain from too much sitting. I did also invest in this inexpensive exercise bike with a desk attached. OK you’re not going to be writing books on this thing, but you could easily do your allotted hour of morning Facebook or answer some emails! I also used an app called Stretchly that reminds you to take stretch breaks. But really, and most importantly, you have to accept that you cannot work 8 hours a day right now. As a lawyer, I quickly learned that if you managed to (honestly) bill 8 hours in a 10-hour or 12-hour workday, you were doing great. (Which may help explain why I didn’t want to keep practicing law!) But even now, working for a place that requires me to enter my time in 8 hour blocks rather than 6-minute segments, I am constantly feeling that I haven’t really done 8 hours of work in any given day. If your job is teaching and grading, or it’s mostly meetings and paperwork, or working with a team, then maybe working for 8 hours straight is easy most days. But if your job is mostly writing and thinking, it’s just a different kind of work. Writing often only happens in 1 or 2 or 4 hour stretches at most. On a good day, when you’re writing the easy section where you already have lots of ideas and the research is complete, you might be able to work productively for a whole afternoon or a whole day. But you won’t be able to keep that up for a week or a month. And it may take you four days of staring at a blank screen before you get going at all. Scheduling work time is the key. You can’t just wait for inspiration, you have to sit down to work even if it’s hard to get going. Some people like the pomodoro method (25 minutes of intense writing followed by a 5 minute break), some would rather work intensely for longer. Try to build other kinds of work in—maybe there’s a Zoom meeting in the morning and then you can work through the afternoon. Some people like to alternate reading days and writing days, to be inspired by awesome new research they’re reading about. Or you can plan to do some research in the morning and writing in the afternoon. Try to end your day knowing what the next few sentences are so you can jump right back in the next day. When I’m really stuck, sometimes it helps me to work on a different, easier project for a little while where the words just flow. (In fact, that’s basically why I am writing this piece right now.) Take notes on a book you’ve read, write a blog post, write some ideas for another part of your chapter. My online writing group on Slack was a life-saver for my dissertation, and if your coworkers are up for this or if you can find another good group of people whose schedules work with yours, they can push you and also support you. At the very least it’ll get your butt in the chair at a certain time of day. In my group, we would get together online at a set time a few days a week, chat for a few minutes then work “together” for a couple hours before taking a break to check in on how it went and chat about it. Or you could just do the check-ins. The goal is to create some accountability for what you are going to accomplish, and also someone to talk to about the challenges. In my opinion, you are also going to be most successful if you accept your natural circadian rhythms and work at the times of day when you are productive. When I first started my dissertation, I pushed myself to sit down to work at 9 am. And soon found that I was sitting there wasting time and being useless until about 4 pm, when suddenly I’d get to work and be productive till long into the night. Which meant I was spending 12 hours or more at the computer but only doing 4 or 5 hours of real work. Once I adjusted and focused my efforts on the 4 pm-midnight period, and allowed myself to rest during the daytime, I was so much more effective and happier. I know this isn’t possible for everyone, with strict work times or kids’ schedules. My husband was annoyed that I was on such a different sleep schedule than him. But it’s what worked for me, at least during the periods when I was really working intensively. Obviously, I am not saying “work when you feel like it”—you will never feel like it. Instead, I’m saying schedule your mandatory working time for when you are most likely to actually get work done. Whatever schedule you work on, try to make sure you’re really sleeping 7-8 hours a night. This is so important for keeping up your energy—and your immunity. And if you do end up working in the middle of the night, you have to give yourself permission to relax and recharge at other times of day, even if that’s when other people are working. I’m not a sleep expert, and I’ve never had serious trouble falling asleep, but one piece of advice I can offer is audiobooks. When I was staring at a screen all day reading and writing, picking up a novel before bed was not that appealing. But audiobooks allow you to rest your eyes and your mind. Short stories are good if a whole book is too much to bite off. (A lot of audiobook apps have a timer, so you don’t fall asleep and have it playing all night.) I also taught myself to knit, to give my hands something to do while I listened to books or watched TV, and I definitely recommend crafting of any kind as a way to recharge from the brain work! One big challenge right now that I didn't have in the past is that the house is full of food. I’ve always been careful not to keep too many snacks on hand so I couldn’t give in to cravings. But now that we have stocked up, there’s a lot more temptation. All I can offer on this is to try to have a schedule for healthy, filling meals, and maybe use the snacks as a reward that you can earn after a certain amount of work. And I guess I can offer you a great recipe! 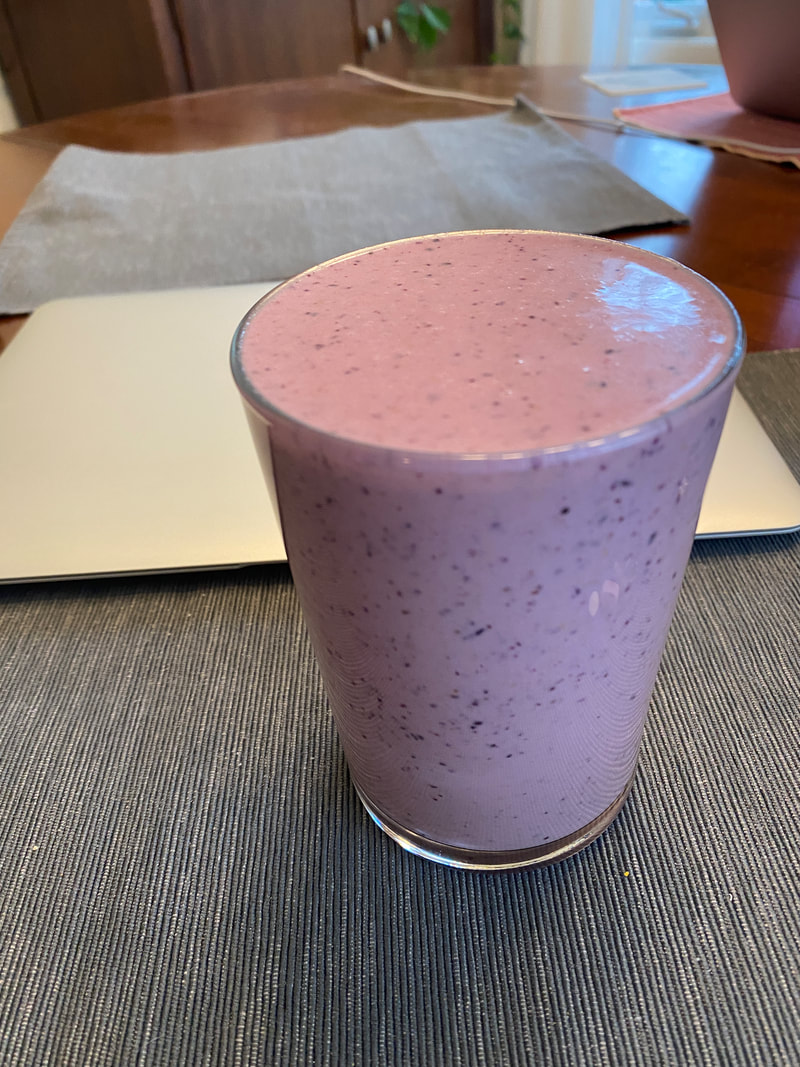 This smoothie recipe has become my everyday breakfast, and one that I wake up excited for! Depending how much almond butter I put in, it will hold me for hours until lunch. Oh, also, did you know you can freeze peeled, sliced bananas?! I am definitely stocking up in case fresh bananas run short in the next couple weeks. Kefir is easily available in the dairy aisle even in my little town, and it’s not exactly something that people are hoarding, and it also keeps well since it’s fermented. Dissertation Brain Food Smoothie 1 cup low-fat unsweetened kefir (or plain yogurt, or whatever kind of milk you like) 1-2 tbsp almond butter or creamy peanut butter 1 small banana, cut into 1-2” slices (can be either fresh or frozen) 1/4 - 1/2 cup frozen blueberries Optional: 2 tbsp ground flax seed (you could also try hemp seed or chia seeds if you like them) Optional: 1/4 cup baby spinach or other greens Optional: 1/2 tsp honey (but I don't think you really need it) Add ingredients to blender and blend. If your blender is wimpy, it might help to add the liquids before the fruit. Last week I wrote a blog post for the MAPA Blog on current legislative threats to archaeology, including efforts to gut the Antiquities Act and, most urgently, the tax bill. Although the Senate has since passed a bill, the effects are still unclear since the House bill and the Senate bill are very different. Most notably, the worst provisions for graduate students (taxation of tuition waivers) appear only in the House version. The two bills will have to be reconciled this week, so it's not over yet!
The post is here: mapabing.org/2017/11/29/legislative-attacks-on-archaeology/ Over the past month, I have been the guest editor for Binghamton's MAPA blog, a blog about public archaeology. I wrote about themes relating to the law and how it relates to archaeology. Here are links to my four posts:
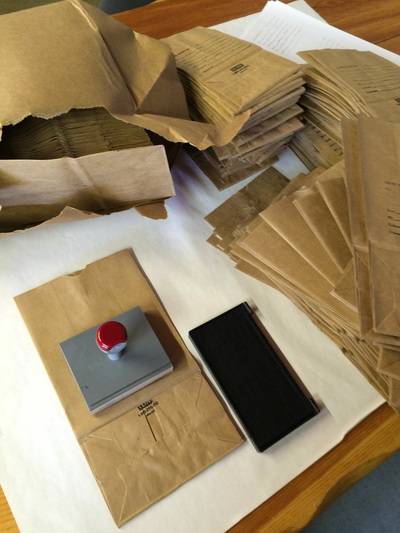
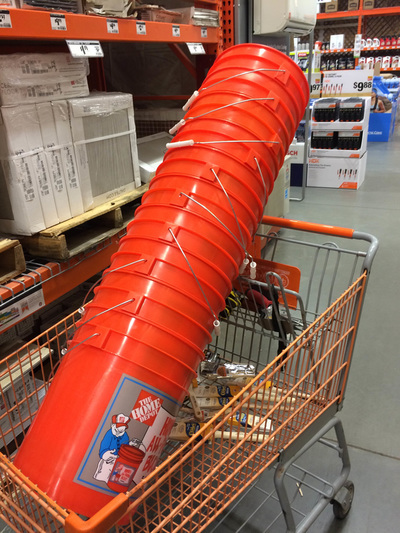
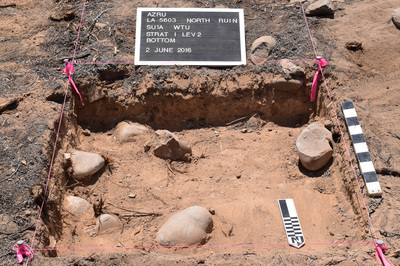
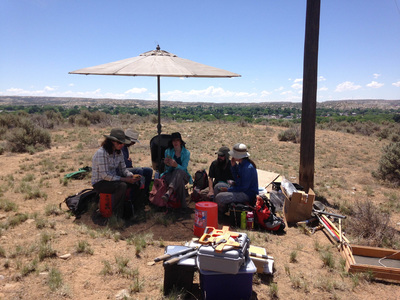
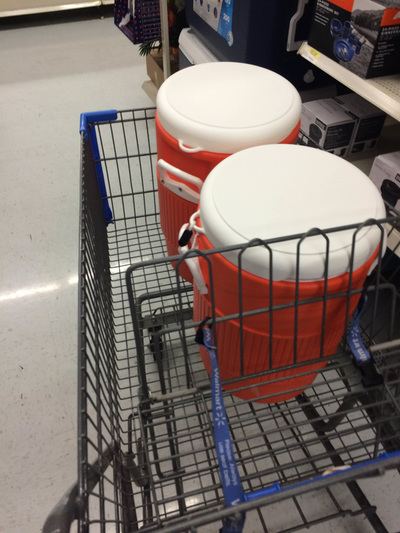
Checks and Balances: The Legal Future for Archaeology and Archaeologists, on what archaeologists can expect, and what we can do, after the 2016 election. When Archaeologists Teach the Law, on archaeologists educating people about the law, including the discovery doctrine. NAGPRA After Kennewick Man, published the week that Congress voted to repatriate Kennewick Man, discusses recent high-profile NAGPRA violations. “So, you dug it up and then you just reburied it?” is about the questions I sometimes get about our excavation project, and how they relate to public archaeology. Recently, I had to do some shopping for my first archaeological dig. It was my dissertation project, though my PhD advisor really ran the excavation. (Read more about the project on my Aztec North page!) But the part that really was my job, even after we got into the field, was buying the equipment and supplies, organizing the paperwork for field use, and otherwise making sure we had everything we needed to do good work. I had done a couple of field schools and digs, but really this was all new to me, and I found very little guidance about gear and supplies on the internet. So, to remind future me about what I learned, and to help anyone else who needs to think about these details, I thought I would write down some of what I did. Some of this might be totally obvious to people with more experience, but maybe it will help others. Two notes here. First, I actually didn’t have to buy any of the usual big excavation equipment. We were working at a national park that provided us things like wheelbarrows and screens and shovels. My advisor also had some things—notably, a Total Station. So I was mostly buying the little things that I suspect people don’t always put a lot of thought into, and that’s what this post will mainly be about. Also, I did have plenty of grant funding for what was a pretty small dig, with volunteers as a crew—but I had to feed everyone through the month too, and I wasn’t really sure what that would cost, so I was still very budget-conscious when it came to our gear. Laying Out Units The list my professor gave me said to buy “big nails” and “string.” Well, what kind?? After searching around Home Depot for a while, I figured out the nails we needed are actually called “railroad spikes.” They come in several sizes—8”,10”,12”. Home Depot had them at something like 30 cents each in a bucket, or a big box for something like $75. I bought the 10” and they worked great. You need a lot more of these than you might think! Maybe buy the whole box. I wasn’t thinking so clearly on that first shopping trip, so I just bought four for each unit plus a few spares. That worked for the first couple days, but I was back the next weekend buying more as we kept adding square meters to our units without ever pulling any nails. I think we ended up using close to 50, even though we only had four study units. As for string, you want something that will not stretch. I bought masonry twine, and that’s what I’d recommend. One nice thing about it is that it comes in neon colors so people are a little less likely to trip over it and also it’s less likely to be left lying around all over your site at the end because it’s so bright. Buy more of it than you think you’ll need—you’ll end up using it for all kinds of things in the field. (But… if you think you might be finding wood for tree ring dating, then buy some softer cotton twine as well for wrapping that up—I learned that masonry twine wouldn’t work for that because it can cut into the wood.) I didn’t buy a plumb bob because my professor told me she had one, and I regretted that when she forgot hers on the first day. They’re cheap at the hardware store, just buy an extra in case. I did buy a bunch of line levels, which was good because they are always going missing. Also, you’ll need flagging tape. Lots of it. Maybe a couple different colors. A few pin flags could help. Metric tape measures are crucial, but they can be hard to find. I found one at Home Depot, freaked out that there was only one in the whole store, then ended up finding more (but more expensive) at Lowes. You’ll also want a couple of the long flat tapes with the hand crank. And then at least a couple of the wood fold-up ones, which are especially useful for profiling and mapping. I didn’t have to buy any of those, but I suspect the metric kind is not that easy to find. Maybe check online. Field Paperwork Keeping your paperwork organized and safe and easy to use in the field is crucial. I bought a nice filebox from Target for our blank forms, and it worked well. Different blank forms were in separately labeled manila folders. (Filled-out forms went into binders, not the file box, so the box emptied out as we went along.) It wasn’t that full, so we also ended up storing small office supplies in it, and I had extra folders that came in handy when people handed me pieces of paper that I wasn’t sure what to do with. If you have any sensitive documents, though, this is probably not the place for them—it will get dirty and people will be pawing through it all day. Also, institute a rule right from the start that the file box is always closed tight except when you’re getting a form out. We had one big wind gust that would have carried away all of our blank forms if the box had been sitting open. Make sure that you are monitoring the blank forms as you proceed to make sure there are enough left. Stopping work while someone goes to make photocopies is not a good plan—check at the end of the day and make copies at night if you have to. I think I started with about 100 blank PD forms (what we used for each level), and we copied another hundred and fifty more halfway through. The finished excavation paperwork went in a binder. I bought a big 3” binder for this. I had a 1” binder for our photo log, and a 2” binder for our log book. Binders can be ridiculously expensive at the office supply stores, but I’d suggest paying a little extra for the ones labeled as extra durable. Mine didn’t actually fall apart, but one of the rings bent halfway through our month of work, so there was that annoying little gap in the ring. The paper dividers with colored plastic tabs are great and last well in the field. Black is not a good color for a binder because you can’t write on it in Sharpie. I planned to use sticky labels, but I quickly learned those won’t last in the field. So the best way to label your binder is to write on the spine. And for heaven's sake, don’t be like me and label your spines upside down so that people are constantly having to flip it around!! Also don’t stick anything in the inside pockets and expect it to stay there. I bought a plastic milk-crate at Wal-Mart to hold the binders. It took some maintenance to keep this neat. People would throw random tools in there as well as trash. So I had to clean it out on the weekends, but that's a good practice anyway and I was glad not to have the trash blowing around the site. You’ll need clipboards. I wasn’t optimistic about the cheap pressboard ones I found in the big box stores, but they actually did great. (By the way, you'll need a policy about whether people can keep paperwork open on their clipboards overnight or not.) I was really excited to buy myself one of those clipboards that has a storage case built in, but it wasn’t that great. The storage ended up being just for rubber bands and paper bags, and the whole thing got really hot if I left it in the sun. Also, if you are taking field journal notes, you’ll need a little dedicated notebook for that. Personally, I would want one with pages that you can easily tear out, but most people seem to prefer the composition book style. Other Office Supplies Bring more masking tape than you think you need—I’d say a roll for each study unit or even for each person. We used a ton of it for taping up pollen samples and flotation samples and anything else that needed taping in the field, and we ran out at the end. It’s best to keep it in a backpack or in the filebox so it’s not melting in the sun (and that means it gets lost at the bottom of people’s messy backpacks). Other office supplies I bought for the field included a ton of rubber bands (I bought two bags, all the standard size), a few binder clips, rulers. Don’t forget some of those little reinforcement stickers for when the holes on your forms rip in the wind. I had an assortment of post-it notes in different sizes but we didn’t really use them. I had a three-ring hole punch in the field and we did use it. Your forms should be hole-punched before you get to the field, and so should your graph paper, but there were still times when the hole punch came in handy. I bought the really cheap automatic pencils, thinking there was no difference, but the graphite broke constantly and we ran out faster than we should have. Spend the extra buck or two for the better pencils. Also, buy a few good erasers, especially for profiling. My advisor requires black ballpoint pens for field forms, and she’s right—pencil smudges and also doesn’t photocopy well. Blue ink doesn’t photocopy well either. I did splurge a bit on slightly nicer pens with thicker shafts that are more comfortable for writing, and I was really glad I did. For Sharpies, I was told that the fine ones dry out and gum up in the field so the regular size ones are better. Don’t know if that’s true, but we did fine with the regular ones despite some really bad handwriting. You might want some cardboard boxes for the field. I had bought a pile of banker boxes for post-fieldwork, but we ended up appropriating two for artifact bags—one for “done” bags to be taken into storage and one for “open” bags to put away safely at night and bring back the next morning. Excavation Equipment and Supplies The big equipment is obvious—shovels, screens, wheelbarrows—and you don’t need my help with those. I bought some extra trowels, even though my crew members mostly brought their own. Some paintbrushes in different sizes for cleaning dust (I was advised to buy the ones with natural fibers because they last better). The big orange buckets at Home Depot are cheap. Buy more than you think you need because they break, and because sitting on a bucket instead of the ground to eat lunch or do paperwork is a luxury. (One guy in my crew had a little folding stool that was amazing—get yourself one of those if you have some extra dough.) I found little straw whisk brooms in the cleaning aisle at Home Depot. It took some looking behind other brooms, but they were indeed there. I also bought cheap dust pans from there and they weren’t great. I don’t have a solution, but put more thought into it than I did. You want something that’s not so big that dirt misses the bucket, but not too small, and that has a sturdy handle that won’t bend. My advisor said to buy plastic, not metal, and I think that’s good advice considering how hot metal things get in the sun, but you want sturdier plastic than what I bought. I bought a cheap plastic storage box with a lid at T.J. Maxx to corral all the little items and it was very useful. Anything with a lid is good in the vehicle. You’ll need tarps, or plastic sheeting, to cover your units at night. You’ll probably also want to lay something out under your screens to make backfilling easier. And you should have extra tarps for taking pictures when the light is too bright, for covering up new units you might open as you go along, maybe for sitting on. Again, this was something the park took care of for us, so I don’t have real specifics, but think about it. In New Mexico in June, shade can make all the difference to how much work you get done. If you have the budget for real shade structures, your crew will be grateful. Just remember that the wind comes out of nowhere and you can do a lot of damage if a big tent blows away. And putting up/taking down/stowing/tying down/adjusting shade structures will take up time. We only had a big patio umbrella that the park gave us and that we huddled under for lunch. It blew around many times, but having at least a little shady spot to retreat to when you need a rest can make all the difference. Your gear will last better and be less hot to the touch with a little shade too. Some things we had, thanks to the park, that we might not have bought ourselves: a stepladder to get into the units once they got deep, a big ladder for standing on to take photos from above, a gas-powered leaf blower to clear dust out of the units for photos. Finally, bring some extra gloves and maybe a spare hat. Someone is going to forget theirs one day or be too macho to bring them at all, and you’ll be glad there are extras. Water, Snacks, First Aid I expected the big insulated 5-gallon water jugs to be expensive, but I got them for $20 each at Wal-Mart. While you’re at Wal-Mart, buy the Gatorade mix in big cans for people to mix into their water. I learned pretty quickly that snacks are crucial and even if you’re not feeding your crew (as I was), it would be good to provide something inexpensive for everyone to share. My crew was obsessed with Goldfish—they come in a huge box that you can just take right out in the field. I was buying one to two of these a week. (And FYI, if you don’t want people eating in their excavation units, you need to be really clear about that from the start.) I bought a big pre-packed First Aid box plus extra Band-Aids at Target and it lived in the crate with our binders so we always had it at the site. We barely used it—a few Band-Aids, but it was good to know it was there in case of something bigger. One thing we did use is a wonderful product called After Bite that quickly takes away the pain of ant bites. I also had a couple of extra bottles of sunscreen floating around the van to make sure everyone was covered if they forgot their own. Purell is good to have too, though it always seems to go missing. Profiling Supplies My professor insisted on metric graph paper, and finding it was a huge pain in the neck. I bought a few sheets on Amazon (it was called National Brand Engineer Filler Paper, 10 sq/cm Quad Ruled $7.75/20 pages) but it is super expensive if you buy more than a few pages. The rest of ours came from my engineer dad, who still had a stash from back in the day when they did stuff on paper instead of computer. If you know any engineers, check with them! Or if you go to Canada (hello Vancouver SAA 2017!), buy some metric graph paper. Your other option is to use the non-metric stuff with small squares and just pretend that each square is a millimeter. Works fine as long as no one thinks too hard about it. I did not buy any extra-large sheets of graph paper but I wish I had. We just taped regular sheets together for long maps. One of our crew members had a profiling board, and it was awesome and I wish I’d gotten one. I know you can buy them at Hobby Lobby, and presumably other art stores have them too. Also, my professor had a set of chaining pins, which hold the line taut for you. I don't know what those cost, but you need them. Expendables So this category is the paper bags, which I at least did not realize were going to cost a lot of money and be a pain to find. They’re actually not that expensive… except that you have to order at least 500 at a time. So I bought just two sizes of paper bags (I think they were size 3 and size 6). I really wanted to order another size—big grocery sized bags—but couldn’t justify buying a whole box of them when we’d just need a handful. I looked all over Walmart, Target, Home Depot, etc. for grocery-sized bags and didn’t find them. I’d suggest hoarding a few clean ones from the grocery store in the months before your dig. Whatever bags you buy, you'll need a bag stamp to make them useable. I was lucky to have one from the park. And you'll need to stamp them in advance. Film canisters were another issue. A lot of people collect pill bottles instead now that film is an anachronism, and I guess you can go to the pharmacy and see if they will give you some of their extras. But I really wanted film canisters. I found them, at a price I was willing to pay, on amazon.com. We ended up using over 200 (3 boxes) of them, but they are so much better suited for our purposes than pill bottles that it was worth it. Don’t forget a roll of toilet paper for wrapping delicate things inside the film canisters. Photography Supplies I’m planning to write a separate blog entry about what I learned about field photography, so I won’t go into much detail on my camera equipment here. I’ll just say that the field camera was my single biggest purchase, and then I still needed a lot of other things to go with it—a protective case for the field, an extra battery, two memory cards, a north arrow, a scale bar, and a letter board and letters. I also ended up buying a macro lens when I got into the lab and wanted to photograph artifacts. Much more on the costs of these items, the choices I made, and what I learned about field photography in a later blog post. |
AuthorI am an archaeologist who works on southwestern archaeology and specifically on Chaco Canyon outliers. Archives
April 2020
Categories |
Proudly powered by Weebly
 RSS Feed