|
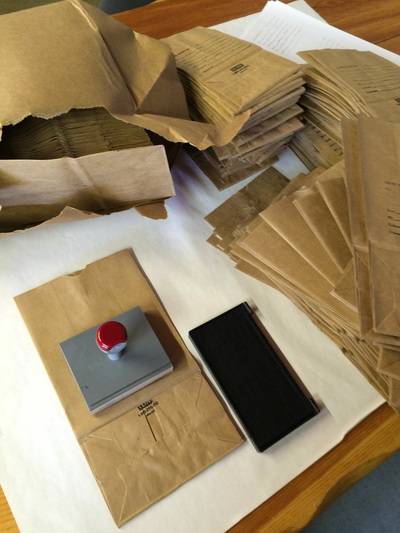
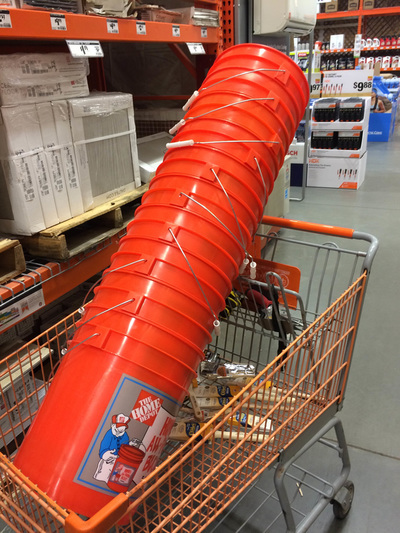
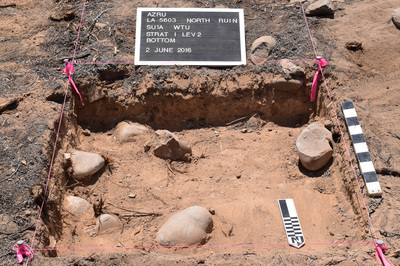
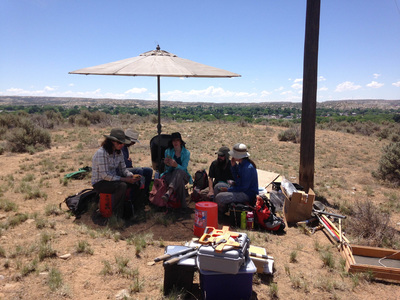
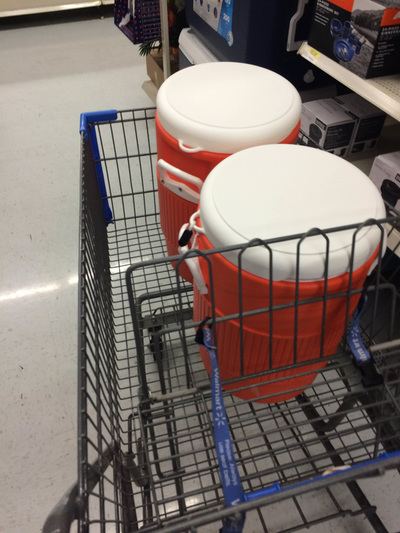
Recently, I had to do some shopping for my first archaeological dig. It was my dissertation project, though my PhD advisor really ran the excavation. (Read more about the project on my Aztec North page!) But the part that really was my job, even after we got into the field, was buying the equipment and supplies, organizing the paperwork for field use, and otherwise making sure we had everything we needed to do good work. I had done a couple of field schools and digs, but really this was all new to me, and I found very little guidance about gear and supplies on the internet. So, to remind future me about what I learned, and to help anyone else who needs to think about these details, I thought I would write down some of what I did. Some of this might be totally obvious to people with more experience, but maybe it will help others. Two notes here. First, I actually didn’t have to buy any of the usual big excavation equipment. We were working at a national park that provided us things like wheelbarrows and screens and shovels. My advisor also had some things—notably, a Total Station. So I was mostly buying the little things that I suspect people don’t always put a lot of thought into, and that’s what this post will mainly be about. Also, I did have plenty of grant funding for what was a pretty small dig, with volunteers as a crew—but I had to feed everyone through the month too, and I wasn’t really sure what that would cost, so I was still very budget-conscious when it came to our gear. Laying Out Units The list my professor gave me said to buy “big nails” and “string.” Well, what kind?? After searching around Home Depot for a while, I figured out the nails we needed are actually called “railroad spikes.” They come in several sizes—8”,10”,12”. Home Depot had them at something like 30 cents each in a bucket, or a big box for something like $75. I bought the 10” and they worked great. You need a lot more of these than you might think! Maybe buy the whole box. I wasn’t thinking so clearly on that first shopping trip, so I just bought four for each unit plus a few spares. That worked for the first couple days, but I was back the next weekend buying more as we kept adding square meters to our units without ever pulling any nails. I think we ended up using close to 50, even though we only had four study units. As for string, you want something that will not stretch. I bought masonry twine, and that’s what I’d recommend. One nice thing about it is that it comes in neon colors so people are a little less likely to trip over it and also it’s less likely to be left lying around all over your site at the end because it’s so bright. Buy more of it than you think you’ll need—you’ll end up using it for all kinds of things in the field. (But… if you think you might be finding wood for tree ring dating, then buy some softer cotton twine as well for wrapping that up—I learned that masonry twine wouldn’t work for that because it can cut into the wood.) I didn’t buy a plumb bob because my professor told me she had one, and I regretted that when she forgot hers on the first day. They’re cheap at the hardware store, just buy an extra in case. I did buy a bunch of line levels, which was good because they are always going missing. Also, you’ll need flagging tape. Lots of it. Maybe a couple different colors. A few pin flags could help. Metric tape measures are crucial, but they can be hard to find. I found one at Home Depot, freaked out that there was only one in the whole store, then ended up finding more (but more expensive) at Lowes. You’ll also want a couple of the long flat tapes with the hand crank. And then at least a couple of the wood fold-up ones, which are especially useful for profiling and mapping. I didn’t have to buy any of those, but I suspect the metric kind is not that easy to find. Maybe check online. Field Paperwork Keeping your paperwork organized and safe and easy to use in the field is crucial. I bought a nice filebox from Target for our blank forms, and it worked well. Different blank forms were in separately labeled manila folders. (Filled-out forms went into binders, not the file box, so the box emptied out as we went along.) It wasn’t that full, so we also ended up storing small office supplies in it, and I had extra folders that came in handy when people handed me pieces of paper that I wasn’t sure what to do with. If you have any sensitive documents, though, this is probably not the place for them—it will get dirty and people will be pawing through it all day. Also, institute a rule right from the start that the file box is always closed tight except when you’re getting a form out. We had one big wind gust that would have carried away all of our blank forms if the box had been sitting open. Make sure that you are monitoring the blank forms as you proceed to make sure there are enough left. Stopping work while someone goes to make photocopies is not a good plan—check at the end of the day and make copies at night if you have to. I think I started with about 100 blank PD forms (what we used for each level), and we copied another hundred and fifty more halfway through. The finished excavation paperwork went in a binder. I bought a big 3” binder for this. I had a 1” binder for our photo log, and a 2” binder for our log book. Binders can be ridiculously expensive at the office supply stores, but I’d suggest paying a little extra for the ones labeled as extra durable. Mine didn’t actually fall apart, but one of the rings bent halfway through our month of work, so there was that annoying little gap in the ring. The paper dividers with colored plastic tabs are great and last well in the field. Black is not a good color for a binder because you can’t write on it in Sharpie. I planned to use sticky labels, but I quickly learned those won’t last in the field. So the best way to label your binder is to write on the spine. And for heaven's sake, don’t be like me and label your spines upside down so that people are constantly having to flip it around!! Also don’t stick anything in the inside pockets and expect it to stay there. I bought a plastic milk-crate at Wal-Mart to hold the binders. It took some maintenance to keep this neat. People would throw random tools in there as well as trash. So I had to clean it out on the weekends, but that's a good practice anyway and I was glad not to have the trash blowing around the site. You’ll need clipboards. I wasn’t optimistic about the cheap pressboard ones I found in the big box stores, but they actually did great. (By the way, you'll need a policy about whether people can keep paperwork open on their clipboards overnight or not.) I was really excited to buy myself one of those clipboards that has a storage case built in, but it wasn’t that great. The storage ended up being just for rubber bands and paper bags, and the whole thing got really hot if I left it in the sun. Also, if you are taking field journal notes, you’ll need a little dedicated notebook for that. Personally, I would want one with pages that you can easily tear out, but most people seem to prefer the composition book style. Other Office Supplies Bring more masking tape than you think you need—I’d say a roll for each study unit or even for each person. We used a ton of it for taping up pollen samples and flotation samples and anything else that needed taping in the field, and we ran out at the end. It’s best to keep it in a backpack or in the filebox so it’s not melting in the sun (and that means it gets lost at the bottom of people’s messy backpacks). Other office supplies I bought for the field included a ton of rubber bands (I bought two bags, all the standard size), a few binder clips, rulers. Don’t forget some of those little reinforcement stickers for when the holes on your forms rip in the wind. I had an assortment of post-it notes in different sizes but we didn’t really use them. I had a three-ring hole punch in the field and we did use it. Your forms should be hole-punched before you get to the field, and so should your graph paper, but there were still times when the hole punch came in handy. I bought the really cheap automatic pencils, thinking there was no difference, but the graphite broke constantly and we ran out faster than we should have. Spend the extra buck or two for the better pencils. Also, buy a few good erasers, especially for profiling. My advisor requires black ballpoint pens for field forms, and she’s right—pencil smudges and also doesn’t photocopy well. Blue ink doesn’t photocopy well either. I did splurge a bit on slightly nicer pens with thicker shafts that are more comfortable for writing, and I was really glad I did. For Sharpies, I was told that the fine ones dry out and gum up in the field so the regular size ones are better. Don’t know if that’s true, but we did fine with the regular ones despite some really bad handwriting. You might want some cardboard boxes for the field. I had bought a pile of banker boxes for post-fieldwork, but we ended up appropriating two for artifact bags—one for “done” bags to be taken into storage and one for “open” bags to put away safely at night and bring back the next morning. Excavation Equipment and Supplies The big equipment is obvious—shovels, screens, wheelbarrows—and you don’t need my help with those. I bought some extra trowels, even though my crew members mostly brought their own. Some paintbrushes in different sizes for cleaning dust (I was advised to buy the ones with natural fibers because they last better). The big orange buckets at Home Depot are cheap. Buy more than you think you need because they break, and because sitting on a bucket instead of the ground to eat lunch or do paperwork is a luxury. (One guy in my crew had a little folding stool that was amazing—get yourself one of those if you have some extra dough.) I found little straw whisk brooms in the cleaning aisle at Home Depot. It took some looking behind other brooms, but they were indeed there. I also bought cheap dust pans from there and they weren’t great. I don’t have a solution, but put more thought into it than I did. You want something that’s not so big that dirt misses the bucket, but not too small, and that has a sturdy handle that won’t bend. My advisor said to buy plastic, not metal, and I think that’s good advice considering how hot metal things get in the sun, but you want sturdier plastic than what I bought. I bought a cheap plastic storage box with a lid at T.J. Maxx to corral all the little items and it was very useful. Anything with a lid is good in the vehicle. You’ll need tarps, or plastic sheeting, to cover your units at night. You’ll probably also want to lay something out under your screens to make backfilling easier. And you should have extra tarps for taking pictures when the light is too bright, for covering up new units you might open as you go along, maybe for sitting on. Again, this was something the park took care of for us, so I don’t have real specifics, but think about it. In New Mexico in June, shade can make all the difference to how much work you get done. If you have the budget for real shade structures, your crew will be grateful. Just remember that the wind comes out of nowhere and you can do a lot of damage if a big tent blows away. And putting up/taking down/stowing/tying down/adjusting shade structures will take up time. We only had a big patio umbrella that the park gave us and that we huddled under for lunch. It blew around many times, but having at least a little shady spot to retreat to when you need a rest can make all the difference. Your gear will last better and be less hot to the touch with a little shade too. Some things we had, thanks to the park, that we might not have bought ourselves: a stepladder to get into the units once they got deep, a big ladder for standing on to take photos from above, a gas-powered leaf blower to clear dust out of the units for photos. Finally, bring some extra gloves and maybe a spare hat. Someone is going to forget theirs one day or be too macho to bring them at all, and you’ll be glad there are extras. Water, Snacks, First Aid I expected the big insulated 5-gallon water jugs to be expensive, but I got them for $20 each at Wal-Mart. While you’re at Wal-Mart, buy the Gatorade mix in big cans for people to mix into their water. I learned pretty quickly that snacks are crucial and even if you’re not feeding your crew (as I was), it would be good to provide something inexpensive for everyone to share. My crew was obsessed with Goldfish—they come in a huge box that you can just take right out in the field. I was buying one to two of these a week. (And FYI, if you don’t want people eating in their excavation units, you need to be really clear about that from the start.) I bought a big pre-packed First Aid box plus extra Band-Aids at Target and it lived in the crate with our binders so we always had it at the site. We barely used it—a few Band-Aids, but it was good to know it was there in case of something bigger. One thing we did use is a wonderful product called After Bite that quickly takes away the pain of ant bites. I also had a couple of extra bottles of sunscreen floating around the van to make sure everyone was covered if they forgot their own. Purell is good to have too, though it always seems to go missing. Profiling Supplies My professor insisted on metric graph paper, and finding it was a huge pain in the neck. I bought a few sheets on Amazon (it was called National Brand Engineer Filler Paper, 10 sq/cm Quad Ruled $7.75/20 pages) but it is super expensive if you buy more than a few pages. The rest of ours came from my engineer dad, who still had a stash from back in the day when they did stuff on paper instead of computer. If you know any engineers, check with them! Or if you go to Canada (hello Vancouver SAA 2017!), buy some metric graph paper. Your other option is to use the non-metric stuff with small squares and just pretend that each square is a millimeter. Works fine as long as no one thinks too hard about it. I did not buy any extra-large sheets of graph paper but I wish I had. We just taped regular sheets together for long maps. One of our crew members had a profiling board, and it was awesome and I wish I’d gotten one. I know you can buy them at Hobby Lobby, and presumably other art stores have them too. Also, my professor had a set of chaining pins, which hold the line taut for you. I don't know what those cost, but you need them. Expendables So this category is the paper bags, which I at least did not realize were going to cost a lot of money and be a pain to find. They’re actually not that expensive… except that you have to order at least 500 at a time. So I bought just two sizes of paper bags (I think they were size 3 and size 6). I really wanted to order another size—big grocery sized bags—but couldn’t justify buying a whole box of them when we’d just need a handful. I looked all over Walmart, Target, Home Depot, etc. for grocery-sized bags and didn’t find them. I’d suggest hoarding a few clean ones from the grocery store in the months before your dig. Whatever bags you buy, you'll need a bag stamp to make them useable. I was lucky to have one from the park. And you'll need to stamp them in advance. Film canisters were another issue. A lot of people collect pill bottles instead now that film is an anachronism, and I guess you can go to the pharmacy and see if they will give you some of their extras. But I really wanted film canisters. I found them, at a price I was willing to pay, on amazon.com. We ended up using over 200 (3 boxes) of them, but they are so much better suited for our purposes than pill bottles that it was worth it. Don’t forget a roll of toilet paper for wrapping delicate things inside the film canisters. Photography Supplies I’m planning to write a separate blog entry about what I learned about field photography, so I won’t go into much detail on my camera equipment here. I’ll just say that the field camera was my single biggest purchase, and then I still needed a lot of other things to go with it—a protective case for the field, an extra battery, two memory cards, a north arrow, a scale bar, and a letter board and letters. I also ended up buying a macro lens when I got into the lab and wanted to photograph artifacts. Much more on the costs of these items, the choices I made, and what I learned about field photography in a later blog post.
1 Comment
|
AuthorI am an archaeologist who works on southwestern archaeology and specifically on Chaco Canyon outliers. Archives
April 2020
Categories |
Proudly powered by Weebly
 RSS Feed